Wednesday, December 30, 2009

The Gift from Mimi

My cousin Donald's wife, Mimi, has taken up watercolor late in her life. I've been very impressed with her talent and choice of subject matter. She reads my blog, so she knows I love lichen and sent this watercolor as a Christmas gift.
I LOVE it!!

What I love even more is that she uses her resources wisely and painted the lichen on the back of another watercolor that I love too.
What to do???????


I love both pictures a great deal, so I'm thinking on how to have them both framed. They are both huge gifts for me. The Blackcap Jam from Rachel was right up there at the top too. Anyway, I want to publicly thank Mimi for her generous gifts to me!

Monday, December 21, 2009

'My Christmas Gifts' 2009

The special gifts I made this year for my friends is festive cranberry sauce.
It is pretty, it is hard to stay out of, and it is easy to make.
My recipe calls for 8 cups of cranberries. I buy the bags of fresh ones when they are on sale and freeze them if there isn't time to put them up when I buy them.
So, you can use fresh or freshly frozen berries.
It is important to go through the bags of berries to discard the overripe/underripe ones.
By the time you have done this you have about 2 cups. It takes 4 bags for this recipe.
While I sort through the berries I bring 4 cups of water and 4 cups of sugar to a boil on a meduim high setting. Boil for about 5 minutes.
I use evaporated cane juice crystals because they are a kind of sugar that has not been bleached or processed to the point of losing the molasses.
When the water/sugar concoction has boiled for 5 minutes, add the 8 cups of fresh cranberries. Do not stir. You can see that I made the mistake of stirring and have foam to deal with. I don't mind it a bit, but you don't want to give foam away as a gift! The berries boil on meduim high until most of them have split their skins. You can hear the 'popping' as they do this while you putter around the kitchen with this activity. It takes about 10 minutes for this part.

You can see beside the cranberries a small saucepan with 7 lids and screw caps. I've washed them and am boiling them for about 5 minutes in about 3 inches of water. In the oven are 7 clean jars in a pan with about an inch of water at 220 degrees for 20 minutes.


When the berries are ready, fill the jars, wipe the rims clean with a damp cloth, place lids and screw caps on, and process for 10 minutes.
I use a steamer canner rather than a boiling water bath because it take much less time. I've used this steamer canner since we lived in Misery (Missouri, to some) in the 80's, so I know it is a time-saving way to process many foods.


Voila! Here is the finished product with labels for whom they are to be given.
My DH loves this stuff, putting it on pound cake for dessert if we haven't had chicken for dinner. He would eat it right out of the jar if I'd let him!


Sunday, December 13, 2009

Christmas Favorites

This blog is for Jackie, who moved me to share some of my favorite decorations. After my last post containing pictures and instructions for my favorite Christmas activity (at Thanksgiving) I want to share some pics of the first decoration that ALWAYS goes before others, usually on Thanksgiving day.
The nativiy scene below was created and constructed by my children; other family member, friends and my students who became enamored of this event have contributed some of the elements rounding out the scene.
There is money which my friend Carol brought back from Israel in the forground along with tiny wrapped gifts. The covered basket was sent to me while serving in China in 2001. It contains tiny dolls. The 'babe' in the basket is a doll that came attached to a larger doll we bought for my daughter when we had our famous $5.00 Christmas. That was all the money we had for each child in 1987. I bought the doll with this tiny dolly attached to her wrist, made clothing from scraps in an old trunk and bought a $.25 suitcase at a yard sale that I lined with white brocade from the trunk too. Anyway, we used this dolly that first Christmas in the state of Misery to enhance the nativity creation. Students have bought and given me stone elephants, cows, angels, camels, and cats to place around the scene too. This is my favorite decoration because of the fond memories of my children and their childhood, along with the fact that it represents the Reason for the season.


Above you can see one of my husband's favorite tree decorations, made by his daughter when she was a child, a popcycle sled with her name onit. I was out of town when he got the tree, and when I returned he'd not only put it up, but had decorated it...something I've never experienced before. It was somewhat sad not to have participated, but he found great joy in doing it by himself.


Another favorite decoration of mine is this cloisonne` ornament I bought at the factory in Bejing when I 'missioned' in China for the first time in the summer of 2000.


The 'icicles' are my favorites too. They came from an antique lamp that was no longer usable. Removing the pendants from the lamp, I tucked them away for decorations the next year and have used them for about 20 years now.


The lack of light, even with a flash, makes our tree look a little sad, kind of Charlie Brown-ish. We are happy with it being small because the living space is pretty full of our regular lives. This Christmas will be quite different in many ways. We will celebrate with only a few family members, I will be recovering from surgery and will not be in on too much dinner preparation, and I will miss my children unendingly. As Zora Neal Hurston says in her book Their Eyes Were Watch God, (and you must say this with a southern accent) "Chilrens gots to have theys own lives." And mine do.
I'm very happy with a simple Christmas, few decorations that don't become tiresome after 20 days, and a quaint, old-fashioned tree. The nativiy is one the grandchildren who live close by can play with too, which warms my heart.
A warm heart, family memories, fudge...for what more could we ask???


Thursday, December 10, 2009

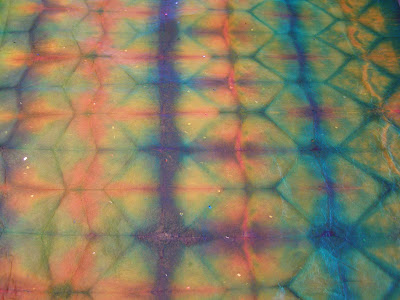
Stained Glass Window Christmas Wrap, Part 2

Here are a couple pictures of the finished product.
As you can see they are really beautiful.
The paper used for these was cheap and sparkly paper from the Dollar Store.

This project is definitely worth the effort and little expense for the food coloring.


Stained Glass Window Christmas Wrap

When the Thanksgiving dinner is over, cleaned up and in hiding for latecomers and snackers I bring out the first of the fun Christmas activities.
We put on Elvis's Blue Christmas album for effect only because that's what we did when my children were young. So this has been going on for about 35 years. We lived in Alfalfa, Oregon when this was first installed as a firm traditon.
Above you see me gathering some of my son's children: Alana, Brianna, and Trenton. Marcus comes in a bit later, after his nap, for the dipping part.
You will need some inexpensive white tissue paper and large bottles of food coloring.
Fan-fold the tissue paper into a long rectangle.
Then fan-fold the rectangle to the point of having a folded piece about 3 inches wide.
You don't have to NEATLY fold! Adults and adept kids can make this activity more interesting by folding the long fan-folded rectangle into triangular folds for the last step. You can see an example of the triangular piece in Trenton's hand below.
This year I used red, green and yellow food coloring, but get blue too if you can. I usually buy 2 bottles of each color so your people can dip as much as they want. I also place an old sheet doubled up on the table for spills.
Holding your piece VERY gently by the top,
dip for 1 full second, lift to let drip,
turn quickly upside down so the color runs.
When the color finishes running, dip into another color. You want as little white showing as posible, and when colors run together you get even more colors. Alana looks a little disappointed in the amount of white on her first one, but has many more opportunities to dip others.


Above, Brianna is happy about her triangle of dipped paper.
You want to dip light colors first, like yellow.


Line up the finished dipped pieces on thick layers of newpaper to dry.
When completely dry(usually the next day) unfold carefully, press with a dry iron and praise each other for the beautious creations! Frame some pieces as gifts, or hang in a dry window for atmospheric effect, or use in gift bags, or wrap your gifts in these treasures.
All my kids and grandkids love this activity...as do I!

You may have noticed the drink in front of me...my creation too.
A "Catherine" is sparkling water (Perrier is best) over ice, a slice of lemon and some crushed peppermint stick sprinkled on top, very festive and refreshing... Bon apetit!